By Harris Terry
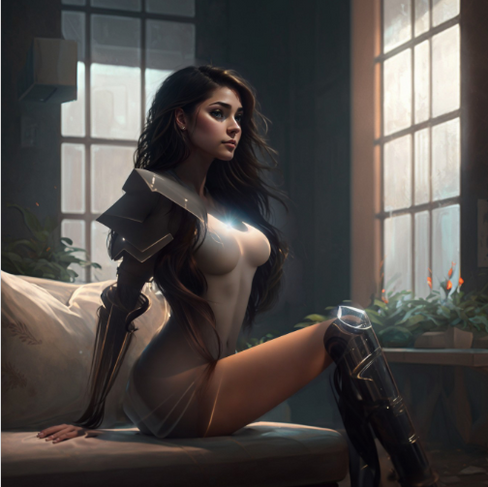
In my continuing quest for knowledge, I came across suggestions from some wise AI artists on Facebook, including Mike Williams https://www.facebook.com/aiartalchemy/ and Viktoria Blank https://www.tiktok.com/@vblank_digital as well as the amazing YouTube channel https://www.youtube.com/@SPYBGToolkit. The method described works very well, and you can look at some before and after shots to see the differences using this method below. In the links below, you can see a starting image that is decent and 1k, and then a highly-edited 4k version which looks much more detailed, but only used Inpainting to make, no normal upscaling was used.
Here are a few examples of what I mean, and if you take the time you will notice differences all over the picture, including faces, armor, hair, backgrounds, and so on. Each link shows a finished picture as well as the before picture.
Each picture was initially done in Midjourney, and then put through the following process, but you could use a picture made in Stable Diffusion or another AI program (or even any image, really).
Workflow
Here is the workflow process from beginning to end:
First, take the image you will improve, and enlarge it to 4k. Do not upscale it, just enlarge it. This can be done right in Stable Diffusion itself, under the Extras tab, under the Single Image tab. Drop your image in, select the Scale To tab, and put 4096 in the Width and Height fields. Make sure no upscaling is happening, we will do that manually soon. Once you are done, right-click and save the picture, and then look at its properties, and make sure it is 4096 x 4096 (or another large size, it can be 16:9 or 2:3 as long as one dimension is 4k). Send this 4k image to Inpaint with the button under the picture, or drop it in manually.
Next, under img2img, select the Inpaint tab. Make sure the Inpaint Area - Only Masked button is selected, and choose your Sampling Method and Sampling Steps (I like DIMM and Huen, usually 25 steps). Set your prompt for your picture, usually as close to the original as possible, and enter your usual negative prompts. Set your CFG and denoise to how you like, usually for this I set CFG to between 7 and 15, and start denoise at 0.50 and reduce if changes are too much. Make sure it is a random seed.
Next, set the Width and Height to 768. What? Yes, while your picture is 4k, setting this to 768 for the mask means when you paint the small mask on a part of the image and hit generate, it will scrunch that 768 into the tiny part of the mask, and reinsert it into the 4k picture.
Now for the Inpainting. For the first step, mask a small part of the picture, usually no bigger than ⅕ of the image. The little pen button next to the image will allow you to change the brush size. Once you have covered the section, hit generate and watch the magic. If you like the improvements, click the send to Inpaint button, and change the resolution to 768 again (it should reset to 4096 each time you return your work to Inpaint, don’t forget or you might get out of memory errors). Click the circular undo arrow next to the image to remove the mask so you can make a new one. Continue to loop this process around: Send pic to Inpaint → set Resolution to 768x768 → remove previous mask → paint on new mask (face, hair, bracelet, necklace, armor section, weapon, etc) → click Generate and see if you like the changes, if not click Generate again until you do → Changes good? Send to Inpaint, and continue the cycle. Once your picture is gone over a number of times on the parts you want detail on, you are basically done. If you want, you can sharpen the image more by reducing to 2k, which will oversample the 4k pic. In the examples I provided, I did the face, hair, outfits, some of the background, and so on until I felt the pic was ready. One important thing to remember is to try and follow lines and shadows carefully. If you are working on a section of skin, make sure to get as much in as possible, as it might leave a line if doing it in multiple parts, almost like a tan line. You can Inpaint the small area to blend using 0.15 denoise, and it should even it out. I had issues with this occasionally with images that show tons of skin, and this trick works well to eliminate any “tan lines” created by Inpainting.
Sometimes certain things might be tough because they are far apart but you want them to be the same, such as two huge earrings far apart in your picture. For this, sometimes I will Inpaint them at the same time, or do one with a seed number, then do the other with the same seed.
And voila! You have not only upscaled your image, but you have also controlled how each part looks separately, giving you much more control than a simple upscale.
Enjoy!
You can find my work at


Comments